
Do you often find yourself slouching? You are not alone! Over 80% of Americans experience posture-related issues at some point. But here is good news: posture fixing is totally achievable. You do not need fancy equipment or complex routines to improve your posture.
Simple, consistent changes truly make a big difference. This post gives you 7 straightforward steps anyone can follow. Imagine less pain, more energy, and a boost in confidence. Good posture offers all these benefits, helping you feel better and even think clearer.
Key Takeaways
Check your posture often. Use a mirror or wall test to see how you stand and sit.
Set up your workspace correctly. Adjust your chair and computer screen to support your back and neck.
Stand and sit tall. Keep your shoulders back and use your core muscles to support your spine.
Stretch and move every day. Take short breaks to stretch and walk, especially if you sit a lot.
Strengthen your core and back muscles. Strong muscles help you keep good posture all day.
Step 1: Assess Your Current Posture
Before you can begin your posture fixing journey, you need to know your starting point. This first step is all about understanding your current habits and identifying common misalignments. Think of it as your personal posture check to see where your body stands. Being mindful of your posture throughout the day is crucial.
The Mirror Check
Stand in front of a full-length mirror. Turn sideways. How does your body look? You might notice some signs of poor posture. For example, do you have rounded shoulders? You can check this by standing against a wall with your heels touching. If your shoulders don’t touch the wall, they are likely rounded. Another common sign is forward head posture.
Look to see if your ear aligns with your shoulder. If your head juts out in front, that’s a forward head posture. Also, check for uneven shoulders or hips. Does one side appear higher than the other? This indicates unevenness in your alignment.
The Wall Test
This simple posture check helps you understand your spinal alignment. Stand with your back against a wall, heels about six inches away. Your head, shoulders, and buttocks should touch the wall. Now, slide your hand behind your lower back. Is there too much space, or too little? This tells you about your lower back’s natural curve. The wall test also helps identify if your head juts forward, if your shoulders round, or if your back arches excessively. It can even show if one hip crest is higher than the other, pointing to pelvic alignment issues.
Daily Posture Scans
Make it a habit to do quick posture check scans throughout your day. Are you sitting slumped at your desk? Are you leaning heavily on one leg while standing? These small moments of awareness are crucial for effective posture fixing. Just a quick mental note can help you gently correct your posture.
Step 2: Optimize Your Workspace
Your workspace plays a huge role in your daily posture. Many people spend hours sitting at a desk. Setting up your area correctly can prevent strain and support good posture. Making a few simple posture adjustments here makes a big difference.
Ergonomic Seating
Your chair is your foundation. Choose one that supports your spine’s natural curves. It needs good lumbar support for your lower back. Look for adjustable settings. You should be able to change seat height, armrest height, and backrest tilt. A waterfall edge on the seat reduces pressure on your thighs. This helps blood flow. Adjust the seat depth too. Your thighs should get full support without pressure behind your knees.
When you sit, push your hips all the way back in the chair. Your lower back should rest against the lumbar support. Adjust your chair height. Your feet must be flat on the floor. Your knees should form a 90-degree angle. This reduces lower back pressure. Keep your elbows close to your body. They should also form a 90-degree angle. Armrests support your arms. This prevents shoulder and neck strain. Even with a great chair, take frequent breaks. Stand, stretch, and walk around. This stops stiffness.
Monitor & Device Placement
Where you place your screen matters a lot. It prevents issues like “tech neck.” Position your monitor about an arm’s length away. This is usually 20 to 40 inches. This distance helps keep your neck and back straight. It stops you from slouching or craning your neck.
The top of your monitor screen should be at or slightly below eye level. This encourages a gentle downward gaze. It minimizes neck tension. It also promotes neutral spinal alignment. Tilt your monitor slightly upward, about 10-20 degrees. This reduces glare. It allows comfortable viewing without too much head movement.
Keyboard & Mouse Setup
Proper keyboard and mouse placement keeps your wrists happy. Your wrist should stay neutral. This means it forms a straight line from your elbow to your palm. Your palm should face the floor. Your shoulders should feel relaxed. Keep your elbow close to your body. It should be at about a 90-110 degree angle. Your elbow should be level with or slightly above your keyboard and mouse. Adjust your chair height or use an adjustable keyboard tray to achieve this. You can also remove keyboard legs for a level wrist.
Place your keyboard directly in front of you. Your elbows should stay close to your body. They should form a 90-degree angle or more. Put your mouse at the same height as your keyboard. Keep it within easy reach. This prevents overstretching. Keep the mouse close to the keyboard.
This avoids too much sideways wrist movement. Avoid using wrist rests. They can increase pressure in your wrist. When typing, float your hands over the keyboard. Rest them on a broad palm support during short breaks. When using the mouse, move from your elbow, not your wrist. Choose a flat mouse design. This reduces wrist extension. A larger mouse can also encourage arm movements.
Step 3: Improve Standing Posture
Sitting is not the only time your posture matters. How you stand is just as important for your overall health. Let’s get you standing tall and strong. Achieving good posture while standing is a key step.
Stand Tall & Balanced
Imagine a string pulling you up from the top of your head. This helps you stand straight. Your head should sit right over your shoulders. Your shoulders should line up with your hips. This keeps your spine’s natural curves in place. This alignment is crucial.
Distribute your weight evenly on both feet. Feel your weight balanced between your heels and the balls of your feet. Keep your knees slightly bent, just a little (about 1-2 cm). This helps engage your core muscles. It also gives your body a strong base. You can even lean your trunk slightly forward, like you are walking into a gentle wind. This helps align your pelvis between your shoulders and heels. This is the foundation for proper posture.
Shoulders Back & Down
Many people have rounded shoulders. This can make you look slumped. To fix this, gently roll your shoulders up, then back, and finally down. Let them rest easily on your rib cage. Do not force them back too hard. You want them relaxed, not stiff. Strong back muscles help a lot here. When your back muscles are strong, they naturally pull your shoulders into the correct position. Think about gently squeezing your shoulder blades together and down. This engages the muscles that support your upper back. It helps keep your shoulders from slumping forward.
Engage Your Core
Your core muscles are like your body’s natural corset. They support your spine. To engage your core while standing, gently pull your belly button towards your spine. Do not hold your breath. You should still be able to breathe normally. This small action helps stabilize your trunk. It protects your lower back. Exercises that stop your body from twisting, like the Pallof Press, are great for training these deep core muscles. They teach your core to keep your spine stable. This reduces the risk of lower back pain. A strong core gives you better posture and more stability.
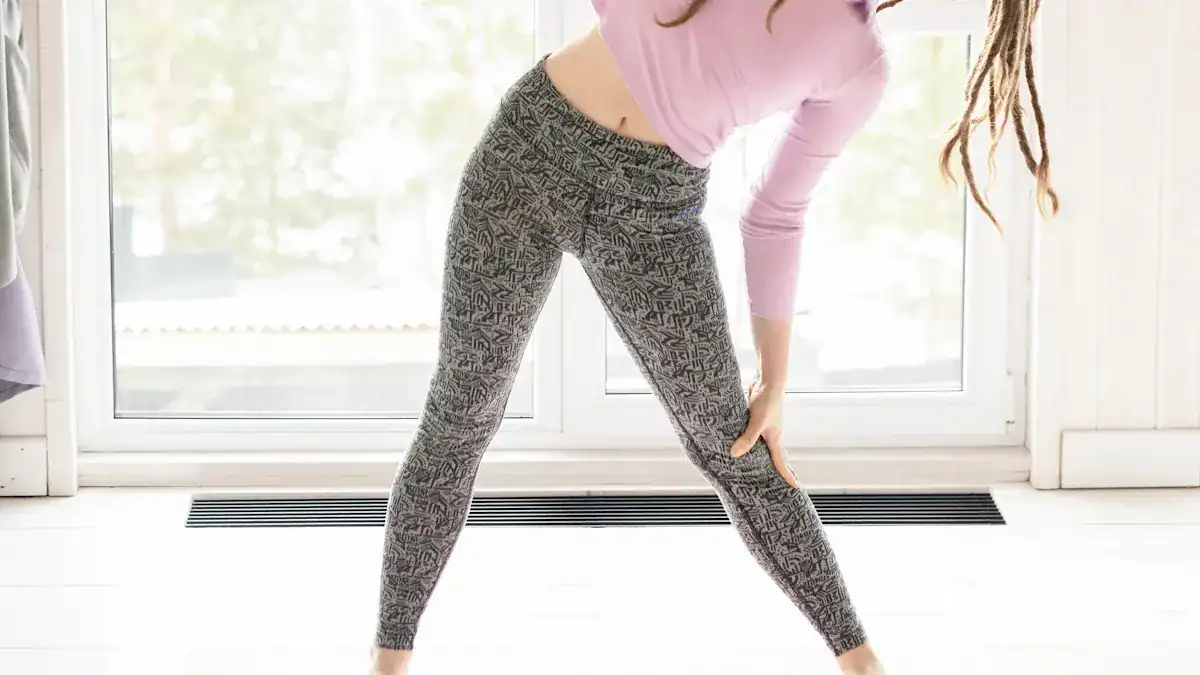
Step 4: Incorporate Daily Stretching
Daily stretching is a powerful tool for posture fixing. It helps undo the tightness from sitting and standing. You can start by focusing on your chest and shoulders. Many people develop rounded shoulders from daily habits. These exercises help open your chest.
Open Chest & Shoulders
You can make a big difference in how your body feels with simple stretching. For example, try a Chest Opener. Stand straight, bring your arms up, then draw them out and backward. Squeeze your shoulder blades. This opens your chest. Another great option is the Corner Chest Stretch. Stand in a corner, place your forearms on the walls, and lean in. This stretches your pectorals and deltoids. These exercises help counteract rounded shoulders.
Neck & Upper Back Relief
Next, let’s tackle neck and upper back tension. Stretching these areas can bring great relief. The Chin Tucks Exercise is excellent. Place two fingers on your chin. Gently tuck your chin in and pull your head back. Hold for 3-5 seconds. You will feel your neck lengthening. Repeat this 10 times for 2-3 sets. This exercise helps correct forward head posture. Child’s Pose is another wonderful stretch. It lengthens your spine and can ease tension in your lower back and neck. These exercises are simple yet effective.
Full Body Posture Stretches
Don’t forget about full-body stretching. It helps improve your overall good posture. The Pretzel Stretch is a multi-muscle exercise. You lie on your side, bring one knee to your chest, and grab the other foot. Hold this for at least 30 seconds. It targets your quadriceps, glutes, and hip flexors.
This stretch improves spinal mobility. Cat-Cow Pose is another fantastic option. It eases tension in your torso, shoulders, and neck. It also boosts blood flow and spinal movement. A simple Standing Stretch can also release tension throughout your body. It helps your spine, glutes, hamstrings, and hips. Incorporate these stretching routines daily. Your body will thank you!
Step 5: Strengthen Core & Back
Building a strong core and back is super important for fixing your posture. Think of these muscles as the foundation for your entire body.
When they are strong, they help you stand taller and sit straighter. Strengthening these areas helps you maintain good posture throughout your day.
Core Muscle Engagement
Your core is more than just your abs. It includes deep muscles that support your spine. The transversus abdominis, your deepest abdominal muscle, works with your multifidus to give your lower back stability. Your pelvic floor muscles, at the base of your pelvis, also stabilize your spine.
Even your diaphragm, which helps you breathe, plays a role in keeping your lower back stable. Other key muscles are your back extensors, like the erector spinae, and the iliopsoas, which connects to your spine.
You engage these muscles in different ways. Concentric contractions happen when muscles shorten, like when you do a crunch. Eccentric contractions are when muscles lengthen, for example, when you slowly straighten up from a slump. Abdominal bracing is when you tighten your core muscles without moving, like when you lift something heavy. You can also try abdominal draw-in, pulling your belly button towards your spine, especially when you breathe out. Physical therapists often teach you how to activate these deep core muscles. They use breathing exercises and specific cues to help you. Try planks, yoga, or Pilates; these exercises are great for engaging your core.
Upper Back Strengthening
Weak upper back muscles often lead to rounded shoulders. You can fix this with targeted exercises. Try Wall Angels: stand against a wall, slide your arms up and down, keeping your hands touching the wall. This helps open your chest. Another good one is the Standing Row. Use a resistance band. Pull it back, squeezing your shoulder blades together. This strengthens the muscles that pull your shoulders back.
You can also do Shoulder Blade Pushes. Lie on your back, push your shoulder blades down and back into the floor. This strengthens your back. For a quick fix at your desk, try Chair Shoulder Squeezes. Sit tall, imagine squeezing a ball between your shoulder blades for 10 seconds. Repeat this several times a day. These exercises help prevent your shoulders from rolling forward.
Glute & Hip Stability
Your glutes and hips are also vital for good posture. They help keep your pelvis aligned. Glute Bridges are excellent. Lie on your back, lift your hips by pressing your heels into the ground, and squeeze your glutes. This strengthens your gluteus maximus and core. Side-Lying Clamshells target your gluteus medius. This muscle controls your pelvis and helps with lateral stability. Lie on your side, knees bent, and lift your top knee without moving your hips.
Standing Hip Abduction also strengthens your hip abductors. These muscles stabilize your pelvis. Just stand tall and slowly lift one leg to the side. Don’t forget to stretch your hip flexors. Tight hip flexors can tilt your pelvis forward. A Hip Flexor Stretch in a lunge position can help. These exercises improve your overall body alignment and stability.
Step 6: Prioritize Movement Breaks
Sitting for too long is a big problem. Your body needs movement. Make it a rule to move often.
The 30-Minute Rule
Research shows that breaking up long sitting times helps. Try to interrupt prolonged sitting every 30 minutes. Even short bursts of activity make a difference. For example, 6-minute high-intensity or low-intensity intervals can help. Light walking breaks also help your blood pressure. This is especially true if you have a sedentary lifestyle. Don’t just sit there. Get up and move!
Desk Stretches & Walks
You can do simple stretching right at your desk. Set a timer. Stand up every hour. Do some stretching. Try neck stretches. Lean your head forward. Roll it to one side. Hold for 10 seconds. Repeat on the other side. Do this three times. You can also do upper trap stretches.
Gently pull your head towards each shoulder. Hold for 10 to 15 seconds. Alternate sides. These stretching routines help. Walk around the office. Use stairs instead of elevators. Walk to talk to coworkers. Have walking meetings. Even marching in place during phone calls helps. These small stretching moments add up.
Avoid Slouching & Text Neck
Slouching and “text neck” are bad habits. They hurt your posture. Over time, poor posture can reshape your body. You might get rounded shoulders. Your neck can get misaligned. This leads to serious problems. Think about arthritis in your neck. You can get long-term damage to your cervical spine. Your lung capacity might even decrease. Your heart works harder.
Chronic aches, sharp pains, and muscle spasms can happen. Nerve root irritation can affect your arms and hands. This starts with tingling. It can lead to radiated pain. You might even get chronic cervical radiculopathy. This causes pain in your arms. In severe cases, permanent nerve damage can occur. This means fewer treatment options. So, be aware. Keep your head up. Maintain good posture.
Step 7: Maintain Good Posture Daily
You have learned many steps for posture fixing. Now, you need to make them a part of your everyday life. Consistency is key. Think of it as a daily commitment to your body.
Consistent Practice & Cues
You need to be aware of your posture all day. This is especially true if you sit or stand for long periods. Take breaks often. Stretch and change your position. When you sit at your desk, keep your feet flat on the floor or a footrest. Do not cross your legs.
Your ankles should stay in front of your knees. Leave a small gap between the back of your knees and the seat. Your knees should be at or below hip level. Use your backrest for support. Relax your shoulders. Keep your forearms parallel to the ground.
When you stand, bear your weight mostly on the balls of your feet. Keep your knees slightly bent. Your feet should be shoulder-width apart. Let your arms hang naturally. Stand straight. Pull your shoulders down and back. Tuck your stomach in. Keep your head level. Your earlobes should line up with your shoulders. Shift your weight if you stand for a long time. Strengthen key muscles like your shoulders, upper back, core, hips, and legs. Move often. No posture is good for too long. Check your posture every 15 minutes. Move every half hour. Stretch tight muscles. This improves flexibility and prevents imbalances.
Mindful Sleep Position
Your sleep position greatly affects your spinal alignment. If you sleep on your back, place a small pillow under your knees. This supports your lower back. Use a pillow that supports your neck’s curve. It should not push your head too far forward. Keep your arms at your sides or across your chest. Side sleeping is good for your back.
Put a firm pillow between your knees. This keeps your hips aligned. It stops spinal misalignment. Use a supportive head pillow. It should fill the space between your neck and shoulder. This keeps your cervical spine’s natural curve. Position your arms in front of you. This avoids shoulder strain. It also helps maintain spinal alignment. Stomach sleeping is not usually recommended. It puts stress on your back and neck. If you must sleep on your stomach, use a thin pillow under your pelvis. Use a very thin pillow or no pillow for your head.
Active Lifestyle Habits
An active lifestyle helps you keep good posture long-term. Staying active strengthens the muscles that support your spine. It keeps your body flexible and strong. Low-impact activities like swimming, cycling, or walking are great choices. Stretch regularly. This reduces stiffness. It preserves spinal flexibility. It also improves blood flow.
Always lift properly. Bend at your knees. Keep your back straight. Hold objects close to your body. Avoid twisting. This prevents injuries. Stay hydrated. Your spinal discs need water to work as cushions. Drink plenty of water. Maintain a healthy weight. Extra weight puts more stress on your spine. This lessens tension on your back. It lowers your risk of spinal problems. These habits help you maintain proper posture every day.
You now know that posture fixing is an achievable goal. You learned to assess your posture, optimize your workspace, improve standing, stretch daily, strengthen your core, take movement breaks, and maintain these habits. Remember, small, consistent efforts lead to big improvements over time. Start with one or two steps, then gradually add more. You will feel better, have more energy, and gain confidence with good posture.
