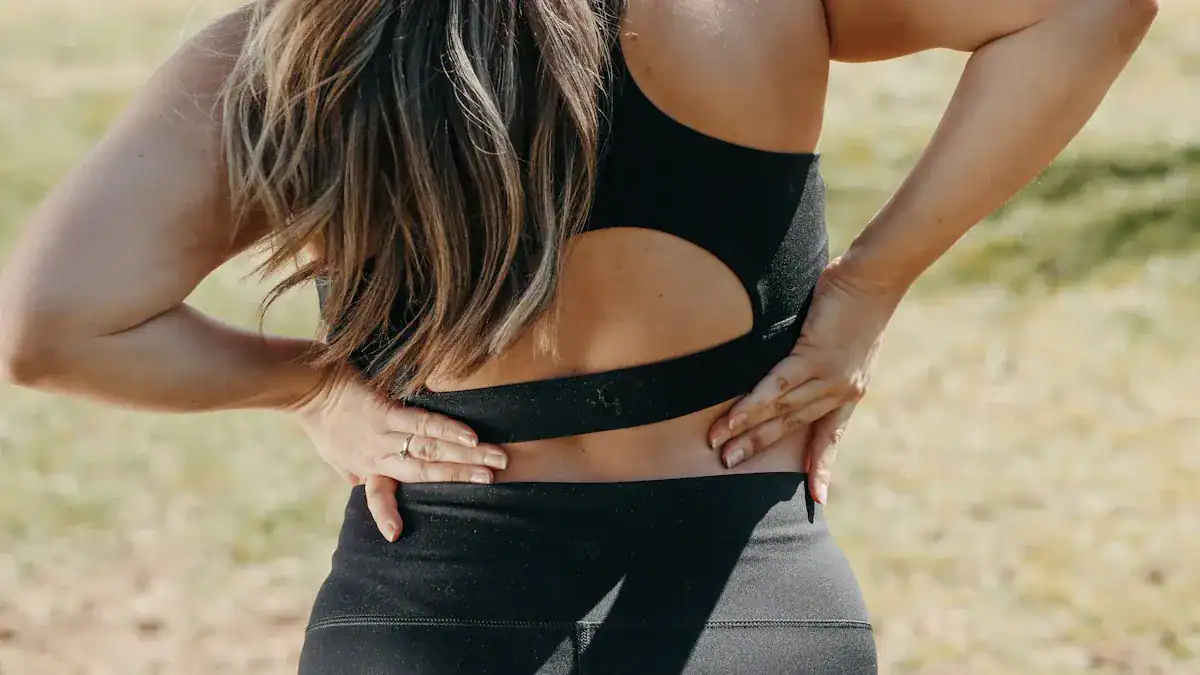
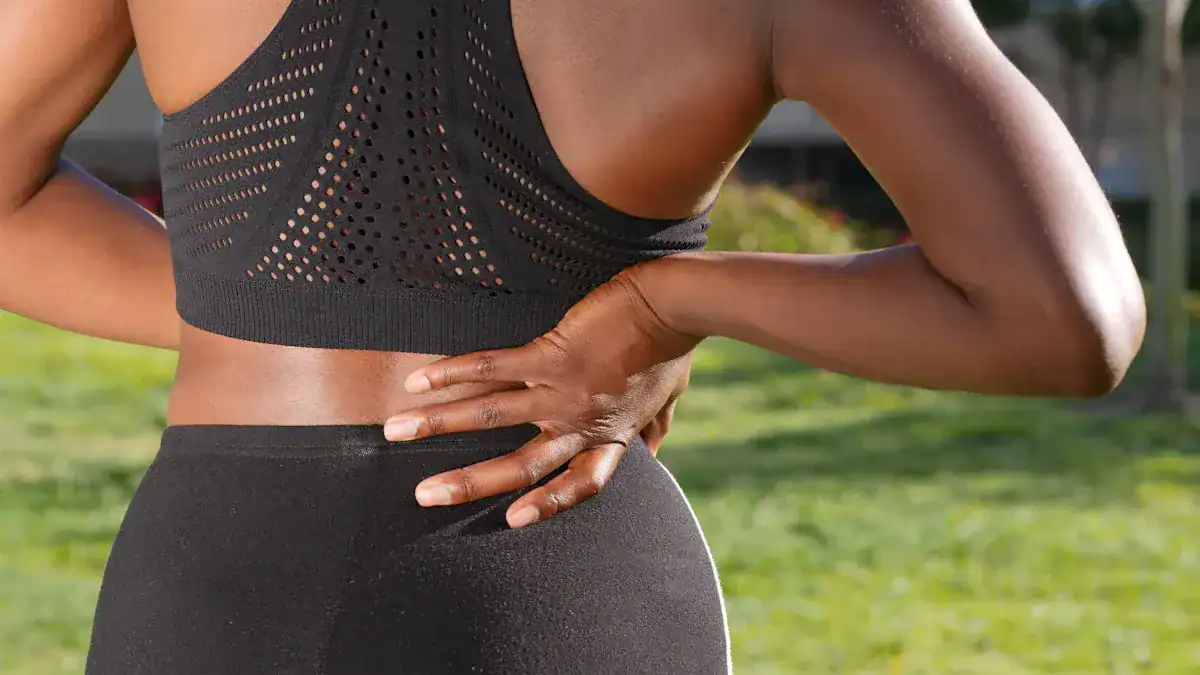
Do you experience persistent lower back pain? This nagging pain disrupts daily life for many. For example, US healthcare spent $134.5 billion on back and neck pain in 2016. Often, weak glute muscles contribute to this recurring back pain. Your glutes play a critical role in supporting your lower back.
This blog reveals the direct connection between glutes and low back pain. You will find 10 powerful fixes. Addressing your glute function offers real hope for back pain relief.
Key Takeaways
Weak glute muscles often cause lower back pain. Your glutes support your lower back and help your body move well.
You can do simple tests at home to check if your glutes are working correctly. These tests help you understand if your glutes are causing your back pain.
Ten simple exercises can help fix the connection between your glutes and back pain. These include glute bridges, clamshells, and hip thrusts.
Always use good form when you exercise. Do these exercises regularly to get lasting relief from back pain.
If your pain does not go away or gets worse, see a doctor or physical therapist. They can help you find the best solution.
Glutes and Low Back Pain: The Critical Connection
Gluteal Muscle Function
Your gluteal muscles are a powerful group. They sit at the back of your hips. You have three main glute muscles: the gluteus maximus, gluteus medius, and gluteus minimus. Each plays a vital role in how you move and stand.
These muscles act on your hip joint. They help you move your thigh away from your body (abduction) and extend your leg backward. They also assist in moving your thigh inward (adduction), rotating it outward, and rotating it inward. Think about walking, standing on one leg, or climbing stairs. Your glute muscles are essential for these everyday activities.
The gluteus maximus is your most powerful hip extensor. It helps you stand up from a chair or climb hills. The gluteus medius and minimus work together. They stabilize your pelvis, especially when you stand on one leg. They also help you move your thigh away from your body and rotate it inward. These actions keep your body balanced and your movements smooth.
Understanding the Glute and Back Connection
Your glutes do more than just move your legs. They are crucial for your overall body stability. They stabilize your upper body and pelvis. This helps distribute load evenly when you move. They also absorb shock from your foot strikes when you walk or run. This reduces strain on your lower back and surrounding muscles.
Strong glutes help maintain the alignment of your pelvis and lumbar spine. They transmit force from your legs to your pelvic girdle. This provides stability to your pelvis and supports your lower back. When your glute muscles activate, they help reduce pelvic tilt. They lower the back edge of your pelvis and lift the front edge. This balanced muscle action keeps your pelvis in a good resting position.
Research shows a direct link between gluteal strength and a healthy back. Maintaining balanced gluteal muscle control is essential for pelvic symmetry. Interventions that target the hip joint can improve pain and disability for people with chronic low back pain. This highlights the important pelvic-lumbar connection. It shows how your glute health directly impacts your back.
How Weak Glutes Lead to Compensation
When your glute muscles are weak, other parts of your body must work harder. This leads to compensatory patterns. These patterns can cause stress and pain in your lower back. Your body tries to find ways to complete movements, even without strong glute support.
Weak glutes often cause pelvic instability. Your glutes are vital for stabilizing your sacroiliac joint and pelvis. If these muscles are weak, your pelvis can move too much. This increases stress on your lumbar spine. You might also develop poor posture, like an exaggerated arch in your lower back (hyperlordosis). This posture puts more pressure on your spinal discs and joints, leading to pain.
You might notice specific movement changes if your glutes are not strong enough. For example, when you run, your hip on the non-stance leg might drop. This is called a hip drop.
Your foot might cross over your body’s midline, known as a crossover step. Your knee might collapse inward (knee valgus) or bow outward (knee varus). You might also swing your arms wider to shift your body weight.
Your torso might lean to the side over your standing leg. These are all signs your body is compensating for weak glute muscles. Your knee might also move too far forward past your foot during walking or running. This shows you are not using your hip extensors enough. These compensations put extra strain on your back, leading to low back pain.
Signs Your Glutes May Contribute to Low Back Pain
You can often tell if your glutes are not working well. Your body gives you clues. Recognizing these signs helps you understand your body better. It helps you address the root cause of your pain.
Common Symptoms of Gluteal Dysfunction
Weak or inactive glute muscles can cause several problems. You might experience poor hip mobility. You may also feel lateral hip pain.
This pain often comes with muscle spasms in your gluteal tendon or piriformis muscle. Your pelvis might tilt forward. This is called an anterior pelvic tilt. It can lead to a sway back, also known as low back hyperlordosis. This happens because your pelvic muscles are out of balance.
A chronically shortened and tight lower back can result from this imbalance. This puts too much pressure on your lumbar discs. This can cause low back pain. Your hamstrings might also get strained. They work too hard to make up for inactive glute muscles. This overcompensation can lead to overload and tears. These symptoms show your glutes and low back pain are connected.
Simple Self-Assessment Tests
You can do simple tests at home to check your glute strength and activation. These tests help you see if your glute muscles are engaging correctly. The gluteal muscle group is very important. It helps with posture, hip and knee health, and athletic performance. These muscles help you push off, slow down, and change direction. They also protect your posture and keep your hips stable during fast movements.
Here are some tests you can try:
Basic Control Test: Can you consciously squeeze your glutes? This test checks your brain-to-muscle connection.
Posture Assessment Test: Stand naturally. Does your posture limit your ability to engage your glute muscles? Incorrect posture can prevent proper glute activation.
Progressing Out of Level 1: Find an exercise where you feel your glute muscles working. Practice it regularly. Then, re-test with exercises that were hard before. This shows improvement.
Basic Glute Muscle Exercises: Try exercises that challenge your strength-endurance. You should feel your glutes as the main working muscle for at least 45-60 seconds. This shows a basic level of ability.
These tests help you understand if your glute muscles are contributing to your back pain.
The 10 Powerful Connection Fixes
You can take control of your low back pain. These 10 powerful fixes help you strengthen your glute muscles, improve your mobility, and reduce discomfort. They offer a comprehensive approach to better back health.
Fix 1: Glute Bridges for Initial Activation
The glute bridge is a foundational exercise. It helps you learn how to activate your glutes. This exercise is low-back friendly. It builds core activation and strength.
How to do it:
Starting Position: Lie on your back. Bend your knees. Keep your feet flat on the floor. Place your arms at your sides. Position your heels about a hand’s length from your glutes.
Foot Placement: Drive through your heels, not your toes. This keeps tension in your glutes. It prevents your quads from taking over. If your quads work too much, your feet are too far forward.
Knee Alignment: Keep your knees in line with your hips and ankles. Do not let them cave in or flare out. This maintains glute activation.
Pelvic Tilt: Slightly tilt your pelvis backward. Flatten your lower back against the floor before you lift. This engages your glutes. It helps disengage your lower back.
Hip Raise: Push through your heels. Lift your hips until your body forms a straight line from your shoulders to your knees. Do not overextend. Your ribs should not pop up. Your spine should not arch.
Peak Contraction: Pause at the top for one to two seconds. Squeeze your glutes firmly.
Controlled Descent: Lower your hips slowly and with control. Maintain tension throughout the movement.
Common Errors:
Hamstring Dominance: If your hamstrings cramp, your muscles are not firing correctly. Move your heels closer to your glutes. Drive through your heels. Squeeze your glutes before you lift. Your glutes should start the movement.
Quad Dominance: If your quads burn more than your glutes, you might push through your toes. Your feet might be too far forward. Keep your toes up and your heels down. Ensure your feet are close enough to brush your heels with your fingertips when you lie down.
This exercise is excellent for glute activation. Studies show high gluteus maximus activation. For example, a 90-degree knee flexion angle can lead to 51.01% MVIC (Maximum Voluntary Isometric Contraction) for the gluteus maximus. This makes the glute bridge an effective exercise for building strength.
Fix 2: Clamshells for Hip Stability
Clamshells target your gluteus medius. This improves hip stability. This exercise is a popular method for glute strengthening exercises. It helps you alleviate back pain.
How to do it:
Lie on your side. Bend your knees. Keep your feet together.
Lift your top knee. Keep your feet touching.
Slowly lower your knee back down.
Benefits: Clamshells stimulate gluteus medius activity. This exercise is low-impact. It is easy to do. It combines hip abduction and external rotation. This efficiently strengthens your hip abductors. It also suppresses compensation from the tensor fasciae latae muscle.
This exercise increases hip stability and mobility. It makes daily activities easier. These activities include climbing stairs, running, and getting in and out of a car. It activates your hip, leg, and butt muscles.
This enhances overall mobility. Physical therapists often use clamshells to alleviate lower back pain and sciatica symptoms. It strengthens and stabilizes your glutes, legs, hips, and core. This can reduce pain. It balances your leg and hip muscles. This aids in injury prevention. It also helps prevent foot, ankle, and knee pain, especially for runners.
Clamshells target your hip abductors. These include the gluteus medius, gluteus minimus, and tensor fasciae latae. This improves balance and stability. It is crucial for runners. It keeps the pelvis and femur stable. This prevents excess movement. It isolates hip abductors. This stabilizes the knee against inward movement. This is vital for injury prevention.
Fix 3: Banded Walks for Lateral Strength
Banded walks, also known as Monster Walks, strengthen your hips. They improve lateral strength. This helps your glute muscles.
How to do it:
Place a resistance band around your ankles or knees.
Stand in a slight squat stance.
Walk sideways. Maintain tension in the band.
Benefits: Weak gluteal muscles can lead to poor lower extremity alignment. This contributes to issues like patellofemoral pain. Hip weakness can cause lower back pain. Your lower back muscles overcompensate when your hips are inefficient. Banded lateral walks strengthen your hip abductors and gluteal muscles.
They engage your Gluteus Maximus, Gluteus Medius, and Gluteus Minimus. The Gluteus Medius and Minimus are key hip abductors. The Gluteus Maximus supports hip extension and outward rotation.
This exercise enhances hip stability. It strengthens your hip abductors, especially the gluteus medius. It also increases knee joint stability. Incorporate this exercise into your warm-up. It activates deep muscles that stabilize your pelvis. This improves hip, foot, ankle, and knee joint stability. This leads to better overall body mechanics. Remember to maintain a stable trunk throughout the exercise. This is crucial for generating hip force.
Fix 4: Single-Leg Romanian Deadlifts
Single-leg Romanian Deadlifts (RDLs) improve balance. They strengthen your hamstrings and glutes. This is a functional movement.
How to do it:
Master the Hip Hinge First: Ensure you can perform a hip hinge or regular Romanian deadlift correctly. This prevents your back from arching or rounding. It ensures movement starts from your hip joint. This is crucial for glute and hamstring recruitment.
Maintain a Square Position: Hinge forward. Keep your shoulders, ribs, and hips parallel to the floor. Do not let your hip rotate open. If balance is an issue, fix your gaze on a point on the floor. You can also use a hand for support on a bench or wall.
Start with a Shorter Range of Motion: Begin with a reduced depth. Get used to the movement. Improve your balance. Gradually increase the range of motion as you get stronger.
Adjust Depth Based on Form: Lower the weight only as far as you can maintain balance. You should not need to use your other foot for support. Lower until you reach the lowest position while keeping your back flat. When you use weights, aim to lower to your knee initially. Then progress to mid-shin.
Benefits: The single-leg RDL places the entire load onto one glute. This makes it highly effective for targeting that muscle. It addresses any muscular asymmetries. This exercise helps with glute activation.
Fix 5: Hip Thrusts for Power
Hip thrusts build powerful glutes. They place less spinal load than squats. This makes them a great exercise for glute activation and hip extension.
How to do it:
Choose the weight: For beginners, start with no weight. Get a feel for the machine. More experienced individuals should begin with low weight. Focus on form. A good rule is to start with about half your body weight. Ensure weight plates are evenly balanced on each side.
Position yourself: Lie down on the back pad. Strap yourself in with the waistband. Ensure it is tight but does not restrict breathing.
Foot Placement: Position your feet shoulder-width apart. Splay them slightly. Adjust foot height on the platform based on your height.
Release safety levers: Push up with your hips until fully locked out at the top. This creates clearance. Then release the two safety levers.
Lower into starting position: Lower your hips as low as possible. Do not let the machine hit the floor. Keep your legs tensed and your core braced.
Explosive upward motion: Push your hips up toward the ceiling quickly and explosively. Stop when your legs are in line with your back. Your knees should be at about a 90-degree angle. Avoid overextension. This prevents spinal strain.
Controlled downward motion: Slowly lower your hips back to the starting position. Maintain control. Keep your legs and core engaged. If you use maximum weight, rest briefly at the bottom after each rep.
Lock the machine: When you finish, resume the extended position. Pull handles to lock the machine. Gently lower your hips until the bottom contacts the locking bar. Unstrap the waistband.
Benefits: Hip thrusts are highly effective for building gluteal power. They show superior muscle activation. The gluteus maximus shows greater activation during barbell hip thrusts compared to squats, barbell deadlifts, and hex bar deadlifts.
This is true for both mean or peak activation, isometric or dynamic. Barbell hip thrusts with external foot rotation can lead to even higher gluteus maximus excitation. This exercise also significantly improves acceleration and sprint performance. This indicates its direct contribution to power development.
Fix 6: Bird-Dog Exercise for Core Integration
The bird-dog exercise integrates your core. It improves core stability and spinal control. It also helps with glute activation.
How to do it:
Get on your hands and knees.
Extend your opposite arm and leg. Keep your back straight.
Hold for a moment.
Return to the starting position.
Repeat on the other side.
Benefits: The bird-dog exercise is a primary method for engaging abdominal muscles. It lights up the transverse abdominis for anti-rotation. It activates the rectus abdominis for stabilization.
It functions as a full-body movement. All muscles work together to build stability and coordination. This makes it an accessible exercise for incorporating major muscle groups.
To perform it correctly, maintain a neutral spine and neck. Keep your head in line with your body. Engage your core by drawing your abs in and up. Protract your shoulder by pushing away from the floor.
This moves your shoulder blades forward. Ensure the hip of your extended leg is internally rotated. Your knee should point straight down. This prevents opening your hip to the side.
Performing this exercise on unstable surfaces enhances neuromuscular control. It improves anticipatory and reactive postural adjustments. This leads to higher core-muscle activation. The bird-dog exercise significantly improves posture and body awareness. It promotes balanced muscle contraction across all sides of the body. This balance is essential for maintaining the held position.
Fix 7: Pre-Workout Glute Activation
Perform light glute exercises before your main workouts. This “wakes up” your glutes. It ensures they engage during your exercise routine. This is an essential glute activation sequence.
How to do it: Choose one or two light glute activation exercises. Perform them for 10-15 repetitions before your main workout.
Examples of Glute Activation Exercises:
Resistance Band Kickbacks: Place your foot in a circular band looped over a pull-up bar. Allow your hip to rise. Push down against the band into an extended position. Lift your leg against gravity. This stimulates your glute muscles. Aim for 10-15 repetitions.
Wall Single-Leg Glute Bridge: Position yourself against a wall with feet elevated. Bend the non-working leg. Press your working foot flat into the wall. Rise slowly. Concentrate on engaging your glute max. Hold at the peak. Then lower. This is ideal for learning glute activation.
Hip Thrust: Sit with your upper back against a bench. Keep your feet hip-width apart. Drive through your heels. Lift your hips until your body forms a straight line from shoulders to knees. Squeeze your glutes at the top. Slowly lower. Focus on hip flexion. Perform 10-12 reps. This works your gluteus maximus, gluteus medius, hamstrings, and core.
Banded Lateral Walk: Place a mini loop resistance band around your thighs above your knees. Stand with feet hip-width apart. Bend your knees slightly. Step to the side. Maintain tension in the band. Take 8-10 steps in one direction. Then repeat in the opposite direction. Research suggests placing the band around your ankles or feet for increased glute activation.
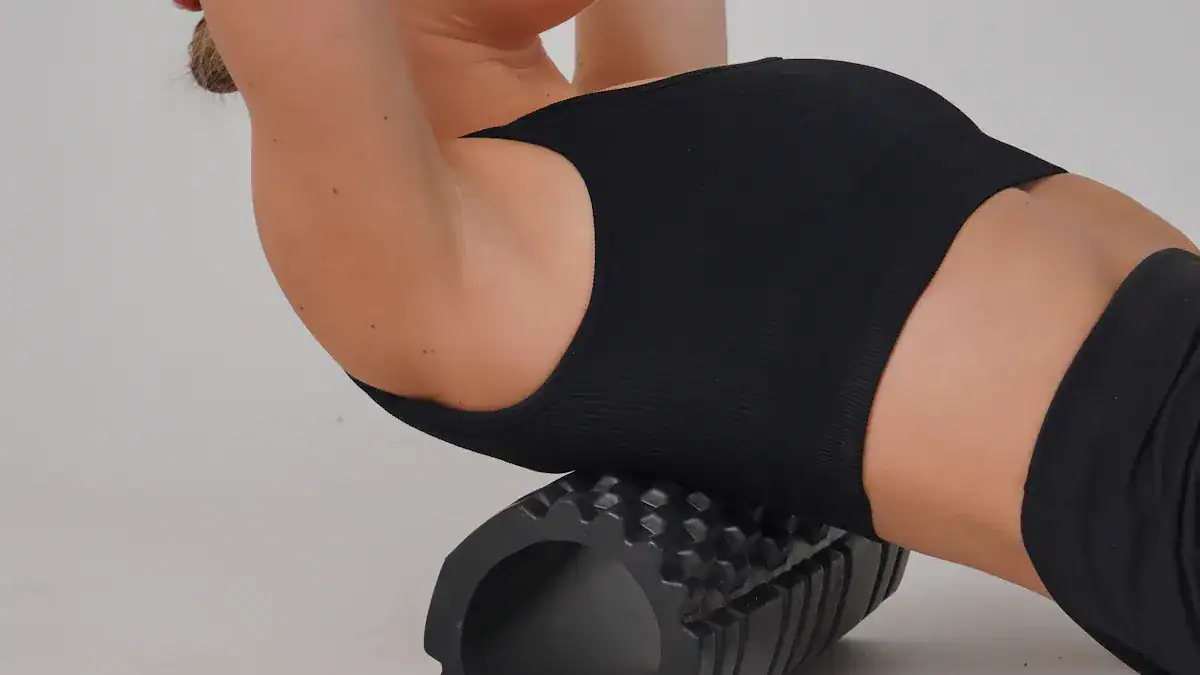
Fix 8: Glute Release and Mobility
Use a foam roller or tennis ball to target tight spots in your glutes. This includes gluteus medius trigger points. This alleviates tension. It improves hip mobility. It reduces tightness linked to low back pain.
How to do it:
Foam Rolling: Sit on a foam roller. Place it under one glute. Roll slowly over tight areas. Hold on tender spots for 30 seconds.
Tennis Ball Release: Place a tennis ball under a specific tight spot in your glute. Apply pressure. Hold for 30-60 seconds.
Mobility Exercises:
Side Plank With Clam Shell: Lie on your side. Place your elbow under your shoulder. Stack your hips. Push into a modified side plank. Externally rotate your top hip. Slowly drop your top knee to close the clamshell. Tap your bottom hip to the floor. Repeat 12-15 reps per side. This targets your gluteus minimus and medius.
Prone Frogger: Lie on your stomach. Bend your knees to 90 degrees. Externally rotate your hips so your knees separate and your heels touch. Engage your glutes. Push your feet toward the sky. Lift your quadriceps off the floor. Pause. Then slowly lower. Perform 12-15 repetitions. This targets your gluteus maximus.
Glute Bridge With Band: Place a mini band around your calves. Lie on your back. Lift your hips into a bridge. Keep tension on the band. Tap your hips to the floor. Then lift back up. Maintain a straight spine. Move from your hips. Perform 15-20 repetitions. This targets your gluteus maximus.
These exercises improve hip mobility. They help reduce pain in your lower back.
Fix 9: Mindful Movement and Posture Awareness
Focus on engaging your glutes during daily activities. This includes walking, standing, and lifting. Be aware of prolonged sitting. This integrates glute strength into everyday life. It improves your posture.
How to do it:
Walking: As you walk, consciously squeeze your glutes with each step.
Standing: When you stand, gently tuck your pelvis. Engage your glutes. Avoid slouching.
Lifting: When you lift objects, hinge at your hips. Use your glutes to power the lift. Do not round your back.
Sitting: Take breaks from prolonged sitting. Stand up and move around every 30-60 minutes.
Benefits: Mindful movement practices develop greater awareness of your body and its alignment. This is crucial for maintaining good posture. It prevents strain. Poor alignment can lead to various physical problems, including back pain.
Proper posture reduces unnecessary strain on your muscles and ligaments. It supports your spine. It enhances overall health. Regularly check your body alignment throughout the day. Do this whether you sit or move. These are simple yet powerful steps toward improving your health.
Weak or underactive glutes lead to compensatory movements. This places undue stress on other muscles and joints. This can cause lower back discomfort. Proper glute activation is crucial for efficient movement. It helps prevent injury in daily activities.
Enhanced glute function contributes to better posture. It reduces your risk of injury. Incorporate targeted glute activation exercises. Be mindful of your posture throughout the day. This is especially important when you sit for extended periods. This can significantly improve overall lower body function. It can alleviate nagging aches and pain.
Fix 10: Low-Back Friendly Squats and Lunges
Focus on proper form for squats and lunges. This strengthens your posterior chain. It creates functional movement patterns. This helps your back.
How to do it:
Squats: Focus on sitting your butt back. Imagine sitting into a chair. Keep your chest up. Squeeze your glutes on the way up.
Lunges (Reverse Lunges are often preferred for back health): Step backward with one leg. Lower your hips until both knees are bent at about a 90-degree angle. Keep your front knee over your ankle. Maintain core engagement throughout the movement. Push through your front heel to return to the start.
Benefits: These exercises strengthen your glute muscles. They improve your hip extension. They build comprehensive posterior chain strength. This supports your lower back. They teach your body to move efficiently. This reduces strain on your back during daily tasks.
Getting Started Safely and Effectively
You can begin your journey to a stronger back and healthier glutes today. Start these exercises carefully. Progress over time. This approach helps prevent injury. It ensures lasting results.
Consistency is Key for Lasting Relief
Consistency is vital for lasting relief. You will not see results overnight. Make these fixes a regular part of your routine.
Even short, consistent sessions are more effective than infrequent, intense workouts. Aim for at least 3-4 sessions per week. This allows your muscles time to recover and grow stronger. Your body adapts to regular exercise. This builds resilience.
Listening to Your Body’s Signals
Pay close attention to your body. Distinguish between muscle soreness and pain. Muscle soreness is normal after a good workout. It usually subsides within a day or two. Pain, especially sharp or persistent pain, signals a problem. Do not push through pain. This can lead to injury.
Signs of overtraining include persistent injuries or muscle pain that do not heal. You might also experience fatigue. Workouts might feel more challenging. You could have disturbed sleep. If you notice these signs, reduce your intensity. Take extra rest days. Consult a healthcare professional if pain persists or worsens.
When to Seek Professional Help
While these fixes can greatly help, you must know when to seek professional medical advice. Self-treatment has its limits.
Persistent or Worsening Pain
You should consult a healthcare professional if your low back pain continues or gets worse. Watch for specific symptoms. These include weakness in one or both legs. You might also have problems with urination or defecation. Other signs are fever, light-headedness, or fainting.
If you have a history of cancer or unexplained weight loss, seek help. Severe pain at night or being 55 or older with no clear reason for your back pain also warrant a visit.
An increased risk of infection due to being immunocompromised is another serious sign. You should also see a doctor if you have progressive neurological findings or radicular pain that has not improved with conservative care.
Neurological Symptoms or Numbness
Certain neurological symptoms are red flags. They require immediate medical attention. These include a progressive loss of leg, bowel, and bladder function. This is especially true if it happens suddenly or quickly.
Look for progressive weakness or new bowel or bladder problems. Other critical signs are numbness or tingling spreading down both legs at the same time, particularly with weakness. Changes in reflexes, coordination, or balance can signal spinal cord compression. Saddle anesthesia, which is numbness around your genitals, buttocks, or inner thighs, is also a serious symptom.
Consulting a Physical Therapist or Doctor
A physical therapist can be a great resource. Shaina Clemons, for example, holds a Doctorate of Physical Therapy. She founded Breakaway Physical Therapy. Physical therapists assess your movement patterns.
They provide cues to ensure effective glute activation without your lower back compensating. They offer professional guidance on how to start, progress, and advance strength programs. They also identify the root causes of your back pain. They develop holistic treatment plans for gluteal weakness and pelvic floor dysfunction. Do not hesitate to consult a doctor or physical therapist if you have concerns.
You now see the profound connection between strong, functional glutes and a pain-free lower back. Proactive glute care is essential for long-term back health and overall well-being. This includes strengthening, activation, and mobility for your glute muscles. Consistently apply these 10 powerful fixes.
Small, consistent efforts yield significant results for your lower back. You can take control of your back health and improve your posture. Embrace these simple, effective strategies for a better back and reduced low back pain.